Muse
Muse is a sequencer of everything audio-related. Muse makes it easy for you to compose music using audio tracks, soft synths, MIDI, effects, and more.
Strengths [Weaknesses]
Full-Featured
Muse knows exactly what it wants to be, and is focused and excellent at being a sequencer/DAW. It has no more and no fewer features than needed to be exactly that.
Stable
Quality code that takes reliability seriously.
Efficient
A sensible user interface for fast and fluid control.
Flexible
Muse has access to internal soft synths, but also to any external synths and effects that JACK offers. It has an inbuilt mixer with audio routing (aux sends and returns), midi routing, sequencing, drum sequencing, and much more; you are free to build your own work environment, using whatever set of modular tools you prefer.
Weaknesses [Strengths]
Not a Waveform Editor
MusE can import and mix audio, but if you are doing extensive work with recorded audio tracks (pop and click removal, for instance), then MusE may not be the ideal tool for you.
All-Inclusive
Muse is modular in the sense that it is fully JACK compliant, so it can accept sounds and signals from any other JACK client. However, if it is a truly modular, one-tool-per-function, experience then MusE might be overkill for you.
Install
In order to compose music on a computer and have it play the music back as a complete musical work, you must use some kind of sequencer if only to get the different tracks to start at the same time. MusE is a sequencer, with the ability to sequence MIDI events, route MIDI channels, place audio files, perform rudimentary mixing, apply effects, and more, making it a full fledged Digital Audio Workstation (DAW).
MusE is quite stable and it's basically feature-complete, so development tends
to be conservative. The build script on http://slackbuilds.org is currently for version 2.1.2, but if you want LV2 plugin support then you should build version 2.2.
To update the build script, open it in a text editor and change the version from 2.1.2 to 2.2 and save it. Then go and download the 2.2 source code from the the MusE website and run the build script.
Launching Muse
In order to use MusE, you must run JACK, the audio subsystem that acts as a sort of patchbay for your system. Since not all applications send audio to JACK, JACK is used only on an as-needed basis. The order of launching your audio rig, therefore, is:
- Connect USB MIDI controller if you use one
- Launch jackd
- Launch MusE
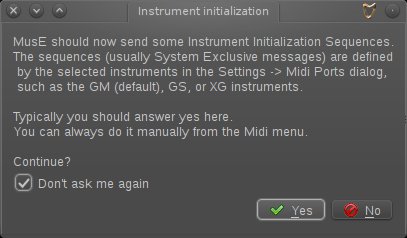
When MusE first loads, it will offer to run some “instrument initialization sequences”. It is safe to accept this, and to mark it as safe for future instances. This sets up internal MusE MIDI connections, and can be changed at any time if you find them insufficient.
To begin a new project, select File menu → New and choose from the list of template projects available. The templates provide a few convenience tracks already in the MusE workspace, but otherwise any template will do, as they can be adjusted at any time. The default template is the most basic: it creates a Master Out channel and leaves the rest up to you.
MusE auto-connects its Master Out to the System Playback output in JACK, so you're all set to make music.
Audio
MusE can handle imported audio files as well as MIDI data. To bring in an audio file, there must be a track ready to accept the audio. To create a new track, right-click in the left Track area, or click the Edit menu → Add Track, and select Add Wave Track.
Give your new track a name by double-clicking on the track label, and typing a name into the text field.
With the newly create WAV Track selected, import your audio file via the File menu → Import Wave File.
Audio tracks can be edited as you would expect; splice the track with the Cutter tool from the top menu bar, erase clips with the Eraser tool, repair cuts with Glue, and move clips around with the standard Arrow tool.
MIDI
MusE is a full-featured DAW, so it has a plugin structure that allows you to use MIDI instruments and effects without leaving the MusE, but you since MusE is a JACK-aware application, there is the added flexibility of being able to use stand-alone synths and effects as well.
Plugins
The advantage to using plugins is that all routing information and synth settings are saved along with the DAW project itself. If you confine your music-making to plugins, you will never have to take snapshots of your JACK setup or save any session files other than that of the DAW itself.
To add a soft synth as a plugin to MusE, first add a new MIDI track.
To create a new track, right-click in the left Track area, or click the Edit menu → Add Track, and select Add MIDI Track.
Give your new track a name by double-clicking on the track label, and typing a name into the text field.
A MIDI track houses nothing but MIDI data. That's all it is; an in-application representation of a MIDI file. So in order for your MIDI data (or spontaneous MIDI signals, more likely) to be of any use, you must have a destination for it. In this example, we will use a plugin.
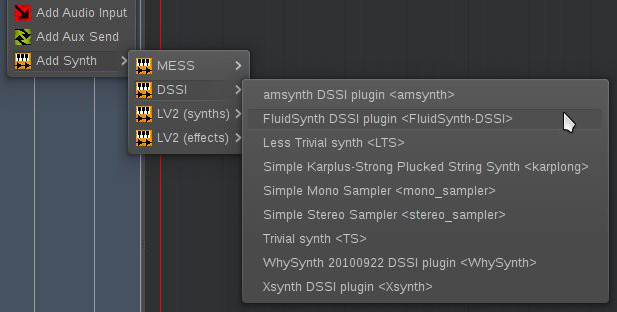
To create a new plugin track, right-click in the left Track area, or click the Edit menu → Add Track, and select Add Synth Track.
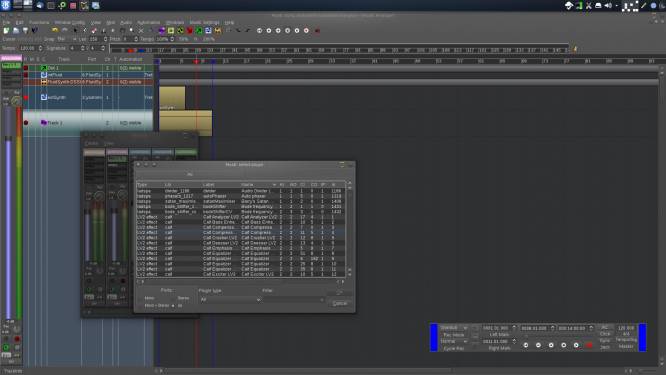
MusE has access to MESS (its own plugin format), DSSI (a common plugin format in Linux DAWs), LADSPA (a common Linux plugin format), and LADSPA v2 (LV2). For this example, use the FluidSynth DSSI plugin (you should have this installed as part of the Slackermedia queue file).
Next, the MIDI track and the synth plugin must be associated with one another; the MIDI data is useless if it's not directed at a listening MIDI port.
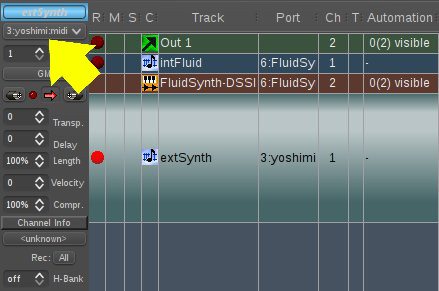
Click on the MIDI track; this should reveal a TrackInfo panel on the left. If not, click the TrackInfo button in the lower left corner of the application window.
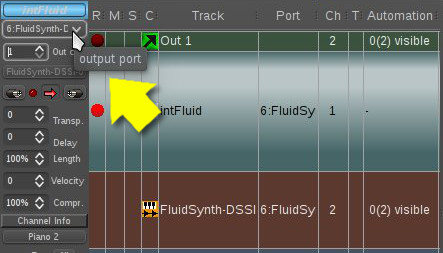
In the TrackInfo panel, set the Output Port to the port occupied by the plugin (in this case, FluidSynth).
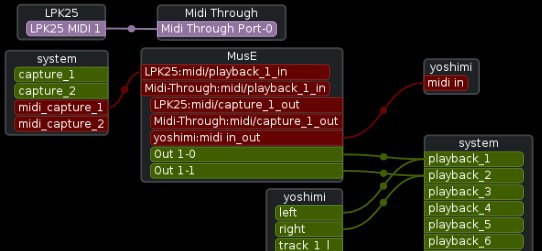
Verify your MIDI routing:
- The controller node should be connected to its counterpart within the MusE node (MusE probably did this automatically for you)
- The audio output of MusE should be connected to the System Playback node so that your speakers or headphones receive the audio for playback
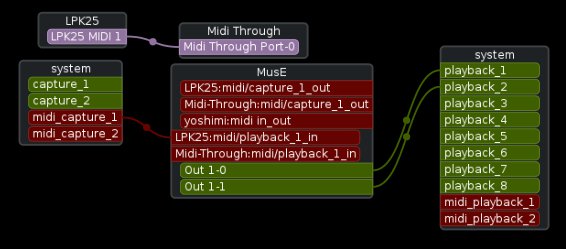
At this point, all MIDI signals are being routed from your external USB controller to MusE, and within MusE the MIDI data is being sent to your MIDI track (all MIDI tracks in MusE receive all MIDI signals by default). The only thing left is to configure the synthesizer itself.
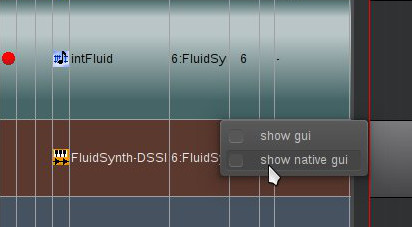
Each synthesizer will be different, but no matter what you are using, there is some mechansism to choose what bank and patch is loaded. To get to the synthesizer interface, right-click on the name of the plugin in the Port column of the track panel and choose Show Native GUI.
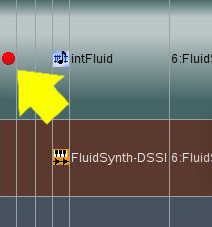
Once you have a bank loaded, arm the MIDI track by clicking on the red Armed button on the far left of the track panel.
Try playing a few notes on your USB controller; you should hear the sounds over your speakers.
Stand-Alone Synth
The advantage to using stand-alone synths is that it keeps your studio modular, letting you swap out what DAW you use, what sequencer you use, every last detail of how things are routed, and so on. Using tools external to MusE means that you must take snapshots of your JACK setup and save all session files individually, as nothing outside of MusE can be saved as MusE settings.
To control a stand-alone synth from MusE, first add a new MIDI track.
To create a new track, right-click in the left Track area, or click the Edit menu → Add Track, and select Add MIDI Track.
Give your new track a name by double-clicking on the track label, and typing a name into the text field.
A MIDI track houses nothing but MIDI data. That's all it is; an in-application representation of a MIDI file. So in order for your MIDI data (or spontaneous MIDI signals, more likely) to be of any use, you must have a destination for it. In this example, use Yoshimi, which was installed as part of the Slackermedia queue file.
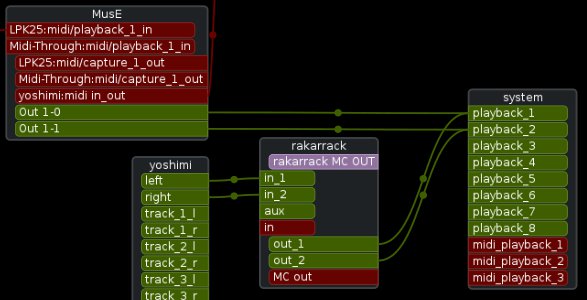
Launch Yoshimi from the K Menu or from a terminal. Yoshimi automatically creates a node in Patchage or a listing in QJackCtl.
Next, the MIDI track and the external synth plugin must be associated with one another; the MIDI data is useless if it's not directed at a listening MIDI port.
Click on the MIDI track; this should reveal a TrackInfo panel on the left. If not, click the TrackInfo button in the lower left corner of the application window.
In the TrackInfo panel, set the Output Port to the port associated with the synth you are targeting (in this example, Yoshimi).
Verify your MIDI routing:
- Connect the System Capture controller node to its counterpart in the MusE node
- Connect the external synth node to the Yoshimi MIDI In
- Connect the audio output of Yoshimi to the System Playback node
At this point, all MIDI signals are being routed from your external USB controller to MusE, and within MusE the MIDI data is being sent to your MIDI track (all MIDI tracks in MusE receive all MIDI signals by default) and also through into the Yoshimi synth.
The only thing left is to configure the synthesizer itself.
Each synthesizer is different, but no matter what you are using, there is some mechanism to choose what bank and patch is loaded. Switch over to the synthesizer on your desktop and configure it.
Once you have a bank loaded, arm the MIDI track in MuSE by clicking on the red Armed button on the far left of the track panel.
Try playing a few notes on your USB controller; you should hear the sounds over your speakers.
Playing and Recording MIDI
Recording MIDI input occurs on the MIDI track (not the plugin track). You don't need to connect the MIDI track to any synthesizer to record MIDI data (although it usually helps to hear what you are playing).
You don't even need to record within MusE itself. Since a MIDI track simply holds MIDI data, you can probably take existing MIDI files from either other sequencers or from MIDI repositories online and load them into MusE, using them to drive your synths.
To record your own MIDI files, arm the MIDI track you want to record to by clicking the red Armed button on the far left of the track panel.
When ready, click the Record button in the transport window.
The record button triggers a Save dialogue; since you'll be recording MIDI data, you must create a file for it to be saved into. It's usually best to save your MIDI files in a project-specific directory so that if you archive the project later, all of the files that it needs to work will go along with it. See Planter for Slackermedia's contextual project management tool, or create your own solution.
Once you have created a file for your MIDI data, press the Play button in the transport window. Recording begins immediately and records each key press on your controller.
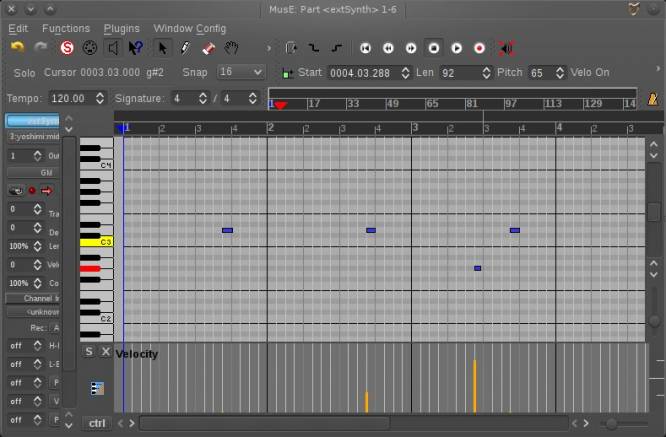
Once you have a MIDI region in a track, you can edit the MIDI data (and add more) in a “piano roll” editor; right-click on a MIDI region and choose Piano Roll, or select the MIDI region and press ctrl e.
Effects
Effects, like synths, can be external to MusE or they can be plugins that occur within MusE. The latest versions of MusE have access to DSSI, LADSPA, and LV2 effects, so there's little reason to use external effect units. In fact, using inbuilt effects gives you finer control over which track gets what effect, so mostly you'll probably want to default to them. But a few effects are only stand-alone, so you can use external effects as needed; it's just a matter of routing the audio properly.
To use plugin effects from within MusE, press F10 to view the main Mixer window, or select View menu → Mixer A.
In the Mixer window, right-click on a plugin slot of a track you want to route through an effect and choose new from the contextual menu.
To configure the effect unit you have added, just double-click on the effect name in the plugin slot. Either a native or a MusE GUI will appear, depending on what is available (a native GUI is given preference).
Exporting / Bouncing
Exporting your final project to a file (in audio terms, this is usually referred to as “bouncing”) requires a full, real-time playback of the selected area of your project.
By default, the “in” point of your playback region is the beginning of the project; it's indicated by a blue transport marker. You can move this position with a middle-click.
To mark the “out” point, use a right-click.
To bounce the audio to a file, click on the Audio menu → Bounce to File.
Documentation
For full details on using MusE, see its documentation options at http://muse-sequencer.org/index.php/Support.
