Darktable
Darktable is a powerful photo proofing and organising application, with a wide range of filter-based non-destructive digital darkroom tools. It is an ideal tool for professional or avid hobbyist photographers.
Strengths [Weaknesses]
Photo Management
Digital photography has left most people with thousands of photos that they never look at because they cannot begin to organise them all. Darktable is a sensible organisational environment. Yes, you could just organise photos in your file manager, but Darktable makes the act of organising also the act of proofing, so you can identify and highlight the good ones.
Non-Destructive Editing
Darktable creates a stack of filters through which you may view and export your images. Filters can be modified or removed independently of the source image and of one another.
Weaknesses [Strengths]
Complex
This is an application filled with advanced, professional-level photographic features, so it takes time to learn it entirely and to master it.
Non-Destructive Editing
The non-destructive, non-linear workflow is not for everyone. There are those who prefer to make a manual backup of an image, and then experiment with effects and hands-on bitmap tools. Darktable is not the best solution for that style of work.
Darktable takes a new approach to the digital darkroom paradigm. Digikam and
GIMP, for example, both make changes to the data that you load into them; when
you change the colour balance of a photograph, these applications re-write
pixels to reflect the change (assuming you save the image; otherwise it's done
in RAM only). If you want multiple versions of the same image, such as a colour
version of a photograph as well as a black-and-white version, then you must
copy the source data and maintain, literally, two files (or two layers in one
file, at best). Darktable uses filters only.
Think of Darktable as a lens that you place over a photograph; one filter might make a colour photograph black-and-white, while another might make the colours brighter and more vivid. One filter might sharpen an image and another might diffuse or blur it. In fact, a Darktable lens can also rotate or crop, balance colours, stylize, and much more.
Because the filters are filters, they do not change the source file itself. You can re-order the filters, modify their properties, remove a few, and so on, all without the need to undo the filters that you already applied.
Perhaps most importantly, the workflow is non-linear. The data from the source photo is exactly the same through the entire process, but viewed through the “lenses” of digital filters. You can add, remove, or re-order filters at any time during the process. In traditional pixel-based editors, you wouldn't be able to do that without a series of undo's.
There is a build script available on http://slackbuilds.org which should suit most people's needs.
Lighttable
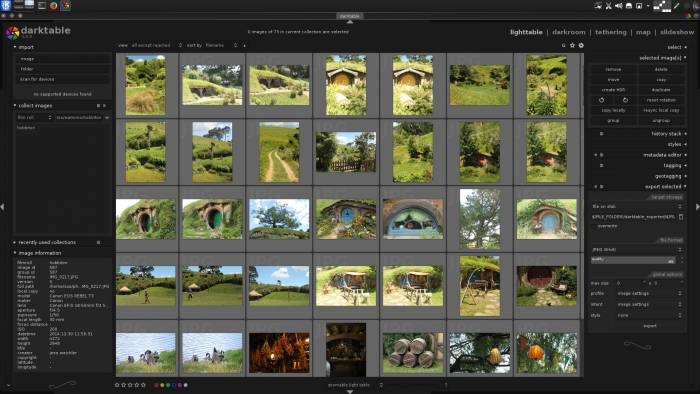
When you first launch Darktable, you will not have any photographs loaded into it. The first step, then, is to import images, either on a per-file basis or by directory. To import, click one of the buttons in the import panel, located in the upper left corner of the Darktable window. Unlike lesser applications, Darktable is modular and respects your filesystem; photos are not moved from where they live on your hard drive when you import them.
You can import RAW images, or compressed images. When you import images, a virtual “film roll” is created and each photo is tagged as being a member of that roll. This is useful if you want to view only the photos taken during one specific shoot, or over your family holiday, and so on.
The film roll designation is only a tag. Photos are not moved from where they live on disk when you import them into Darktable, so it's safe to use tags to organize them within Darktable. You can tag a photo or group of photos however you want; the “film roll” convention is a logical, film-like analogy that Darktable uses, but you can tag photos with any word or phrase that you find useful, and then filter your view of photos by tags.
Once you have imported a few photos, you'll see them on a lighttable-style layout. The lighttable itself can operate in two ways: it can be an array of photos (a sort of File Manager mode), or it can be a dynamic photo viewer with mouse-wheel zooming and middle-mouse click-drag navigation (think Google-map navigation, except instead with a middle-click instead of left-click, or just think of Blender navigation). To switch between modes, use the file manager pop-up menu at the bottom of the lighttable panel.
The lighttable is truly just a photo viewer; there's not much to it, aside from looking at all of your many choices, and possibly rating them (1 to 5 stars) based on how you (or your client) feels about them. The star-rating system is also a form of tags, so later in the process, you can view, for example, only the photos above a certain number of stars.
The lighttable view is just the first of a few different modes that Darktable can run in. The different modes are:
- Lighttable: an array of images, as if you were looking at your film negatives on a, well, light table
- Darkroom: the photo editing interface with non-destructive filters that you can use to enhance a photo the same way you would in a darkroom (or, to be fair, at some later stage of post production or graphic design)
- Tethering: for studio use, permitting you to shoot straight to disk (by passing the memory card in your camera)
- Map: a world map showing geo-location for the current image or images (taken from metadata in the image, if available)
- Slideshow: presentation mode
Each of these modes is accessible from the labels in the upper right corner of the Darktable window.
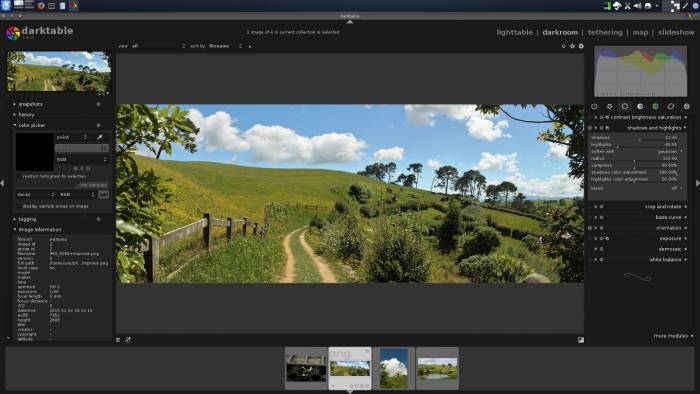
Photo editing work is done in the darkroom panel. To activate the darkroom panel, select a photo and click the darkroom label in the top right corner of the Darktable window.
Darkroom
In the darkroom mode, there are four main areas of interest:
- The left and right panels, which hold filter and property palettes. These are what you'll use to apply effects to your photograph.
- The center screen, which displays the image you're working on.
- The bottom thumbnail bar, providing quick access to your lighttable.
If you need more room to work, you can hide panels and switch to full-screen by clicking the disclosure triangles on the outer edge of each panel (and if you find yourself doing any action repetitively, you can even assign keyboard shortcuts for quick access).
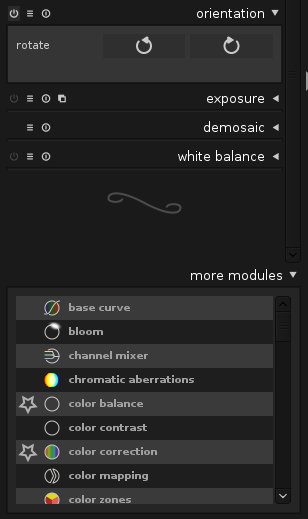
Generally, the darkroom workflow in Darktable starts with the right panel. Any filter placed on a photograph appears in the right filter stack. All available filters are in the bottom right panel, labeled More Modules.
To start, select an image from the lighttable and try adding a filter, or enabling one of the default filters by making a change to some value. You might try the levels filter to enhance the shadows and highlights; this filter is tagged as a member of the tone group, so you can find it quickly by clicking the tone group button at the top of the filter panel on the right. The group buttons are the same as any other tag in Darktable; they show items that have been designated as part of a their domain. Roll your mouse over each one to see the groups you have to choose from.
In the levels palette, adjust the black, gray, and white levels of your photo and you'll see the results immediately. Or you could try the colour correction filter, tagged as a member of the colour group (so you would click on the appropriate group button to find it, or look in the more modules panel to add it it to your stack if it is not already there).
This isn't GIMP; these are all non-destructive edits, so you can change your settings at any time. You can toggle a filter on and off using the on/off icon on the left of the filter title. This is the quickest and easiest way to see a before-and-after version of what you are doing with any individual effect.
All the effects you would reasonably expect as a professional photography are available, and each can be added as filters to your stack. If a filter is in the stack, activate or deactivate them with the on/off icon.
There are “special effect”-style filters, too, such as bloom, vignetting, and grain. These are found in the right-most group, the effect group.
Presets
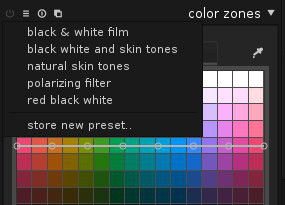
Filters can have presets, some of which ship along with Darktable and others that you may create yourself.
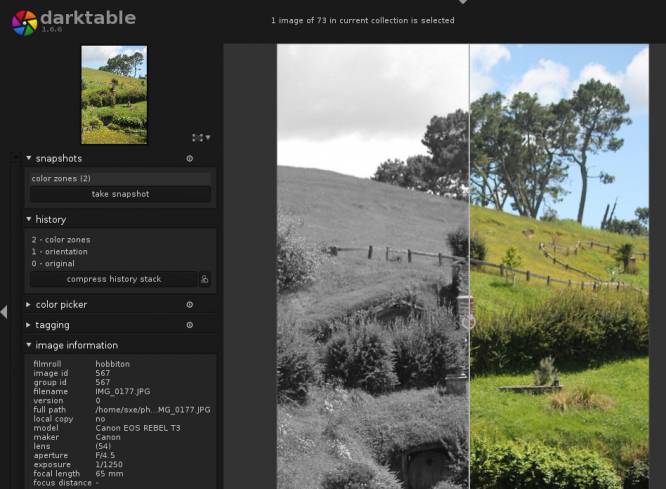
To access a filter preset, use the menu icon to the left of a filter's name. For instance, if you want to convert your photo to black-and-white, click the menu icon next to the colour zones filter (one of the many filters that can produce a grayscale effect) and choose black & white film. Alternatively, just right-click the colour zones filter title and choose from the presets that appear.
Any setting you create in a filter can be saved as a preset for later use by selecting store new preset… option from the preset menu.
Version Flipping
Inevitably, you're going to reach a point in your work when you have a version of a photograph that you like, but you also want to keep playing with filters to see if you can make it even better. There are two ways to do this: one temporary, and one persistent.
Snapshotting
Taking a snapshot of a work in progress is a great way to preserve one particular set of filters so that you can continue to work. A snapshot does not make a literal copy of the photo; instead, it preserves the set of active filters that you, at the moment of the snapshot, have applied to the base photo.
Snapshots are meant to be temporary; it's not a persistent versioning process.
To take a snapshot of your work, click the take snapshot button in the top left corner of the Darktable window.
Once you've taken a snapshot, it's listed in the snapshots panel. As you continue to work, you can always compare snapshots to your photo's current state by clicking on a snapshot name. This displays a split-screen view of the snapshot and your photo.
Duplicating
A more permanent solution to have one photograph serve as the base image for several final versions is to duplicate a photo. Like a snapshot, a “duplicate” photo in Darktable is not a literal copy of the base image; Darktable just saves the filters you've applied to a photo and shows you another representation of the base image with those filters applied to it, as though it had made a copy. It's analogous to viewing one physical print through a red gel, and then through a blue gel, and then a yellow gel, and so on. The result is two versions of the same “physical” computer file in Darktable (but not on your hard drive).
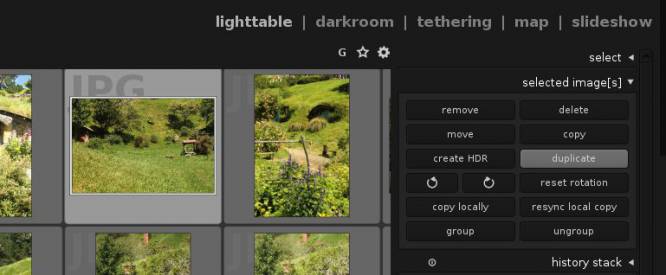
To make a duplicate of a photo, go back to the lighttable view and select the photo you want to duplicate. From the selected images panel on the right, click the duplicate button.
Export
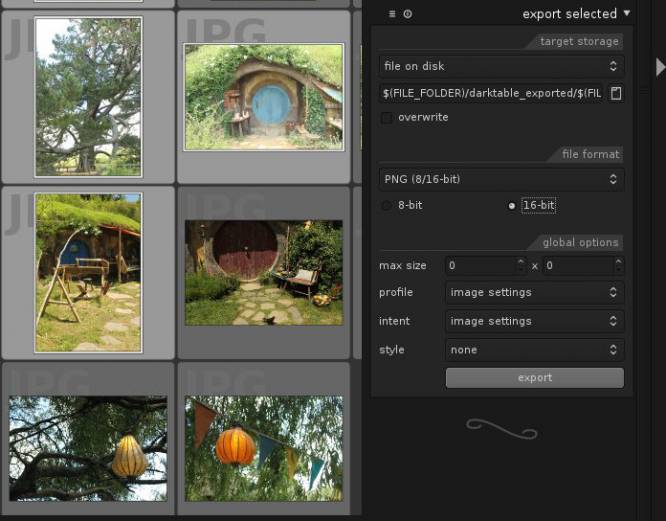
Eventually, you or your client will decide which photos to publish, at which point you'll export your work from Darktable. Exporting a single image or a selection of images is done from the lighttable view.
First, select the image or images you want to to export on the lighttable.
Reveal the export selected panel on the right and set the destination of where you want to save the files. Select the format and quality, and then click the export button. If you're working with relatively flat and small files, the export will probably happen quickly; allow more time for RAW exports.
Customisation
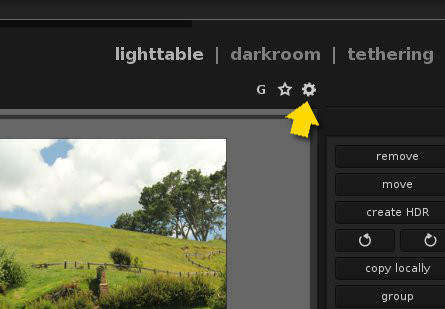
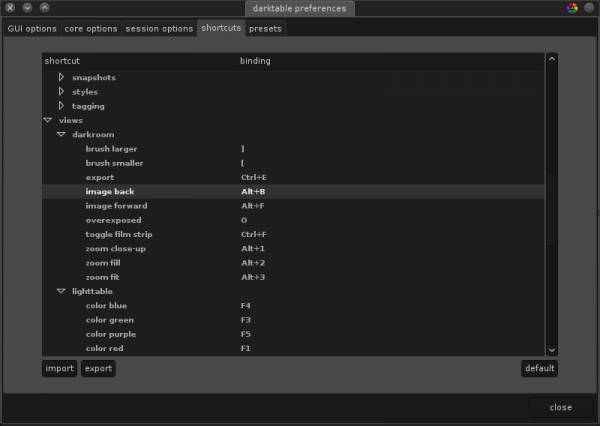
Darktable has a very respectable, albeit somewhat hidden, preference panel. To access it, go to the lighttable view and click the gear icon hiding up in the right corner atop the lighttable panel.
Most of the Darktable defaults are reasonable, but if you're accustomed to keyboard conventions from another application or just your own habits, or are particularly allergic to something that Darktable implements (such as using the Backspace key, universally used to delete something, as the back button in the lighttable view), then you can change almost everything about the keyboard layout.
