Asset Management
Many of us are used to a pre-determined layout of windows and menus when we open a video editing application. Lightworks, of course, does not feature this and allows the user to decide how to do even the most basic tasks, like search through available footage, edits (“timelines”), racks, and bins. This is both flexible and powerful, and can become far more efficient than other models, but it can also be puzzling until you're used to it. So let's review how to manage files and assets in Lightworks.
Search
Lightworks uses a search function where other editing applications use Open or possibly Import menu items. To access the search function, click the Search icon in the launchbar of Lightworks. The icon looks like a folder with a magnifying glass over it.
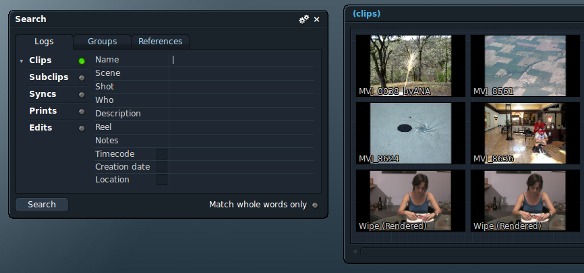
The search window allows you to search for a number of assets; clips, subclips, edits, and more. You can search for each kind of asset based on any number of criteria, including by name, scene, shot, or reel number, description, location, and so on.
To search, first define what type of asset you want to find by clicking the green light next to the asset type. Enter your search criteria in the appropriate field, and then click Search button in the lower left corner. A new bin window will open, and it will contain all the resultant clips or other assets found. As always, you can preserve the bin by clicking its title and giving it a name.
Searching by nothing provides you with a list of all possible results. So to show all available clips, click the green light next to the Clips asset type and click Search. A new (Clips) bin opens, with all of the imported clips displayed for your use.
Finding an edit (“timeline” in the terminology of some other editing apps) is exactly like finding a clip. Greenlight the Edits asset type, and either enter criteria or no criteria, and click the Search button in the lower left corner of the search window.
Organizing a Project
You don't want to have to search for clips and edits every time you open up Lightworks, and for this reason there are bins and racks.
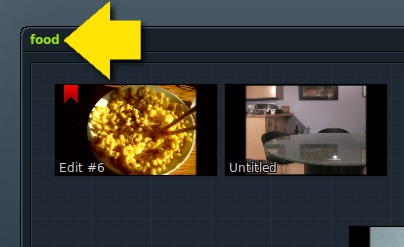
A bin is a collection of assets. You can turn any window that opens as a result of a search into a saved bin simply by giving it a name; once named, a window's title changes from blue to green text, and it has been saved into your current project.
Of course a bin can contain clips, edits, subclips, and other asset types.
In some editing applications, the “bin” is conceptually the same as the project; this is not so in Lightworks. Your project is your project, and you can have any number of bins to organize the assets within that project.
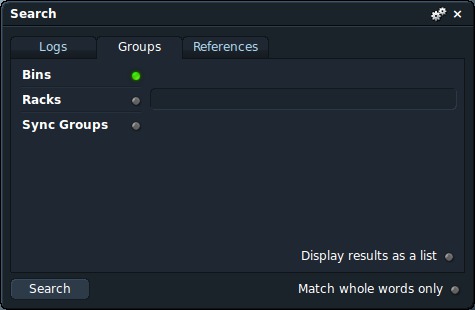
Just as you can search for clips and edits, you can also search for bins that you have created. To search for a bin, use the Groups tab in the Lightworks search window.
Organizing Your Bins
With so many bins available to you, there may be a need to then organize your bins into something convenient. As it turns out, bins can be organized into racks.
Create a rack by clicking the rack icon in the Lightworks launch bar on the left of the screen. To preserve a rack, name it.
Once your rack exists, you can add bins to it, and then search for racks in the Groups tab in the Lightworks search window.
Get a Room
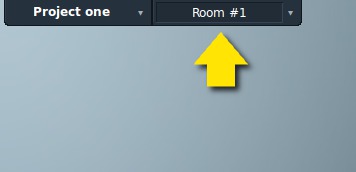
The final organisation tool available to you is the Room feaure. A “room” is any particular layout of your workspace that you want to preserve for later use. Typically, video editors use rooms to set up spaces for individual tasks, such as clip logging/transcribing (in which you might have multiple bins open but no edit window), editing (an edit window and a bin or two), colour correction (no bins, an edit window, and the effects window), and so on. However, you can use rooms in any way you'd like; essentially, it's a way for you to take a snapshot of your workspace layout so that you can return to that layout later.
To create a room, click the Rooms tab in the upper left corner of the Lightworks screen. Move to a new room and your workspace will be preserved.


