Advanced Trimming
Cutting or adding frames to the start or finish of a clip is useful, but sometimes not the quickest way to make a change. There are several other types of trim and cut-related actions that the Edit window offers.
Trimming Previous and Next Clips
In its attempt to make editing as fluid as possible, Lightworks can grab the out point of the previous clip or the in-point of the next clip from where your playhead is currently parked.
In other words, if you are adjusting the in point of one clip, and discover that the trim has thrown off continuity from the previous clip, you would normally have to press a to move back a clip and then e to grab the out point and make your adjustment.
Or you can just press q (notice how its proximity to w mimics the relationship of the previous out point and the current in point of the clips) and then make your adjustment.
Similarly, press r (notice how its proximity to e mimics the relationship of the out point and the in point of the clips) to grab hold of the next clip's in point and make your adjustment.
Moving a Cut (Roll Cut)
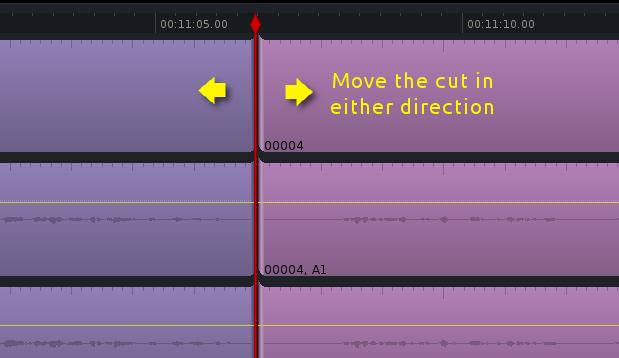
Sometimes it's most efficient to just move the cut itself, without affecting the in and out points of the bordering clips. In some applications, this is called a roll cut.
The end result of moving a cut is that the out point of the leading clip is changed, while the in point of the following clip is changed. But the in point of the leading clip and the out point of the following clip are both unchanged. This is vitally important when the total run time of your picture has been locked, but you still want to alter your edit within the time constraints of other clips.
To move a cut, navigate to the clip you want to trim. On the keyboard, you can move from splice to splice by pressing a to move the playhead left and s to move the playhead right.
Now you are parked at the incoming frame of the clip located just to the right of your playhead. To roll the cut either forward or backward in your edit, press u to float the tail of the clip on the left of your playhead and the head of the clip to the right of your playhead.
Move the cut either left or right using either the play commands (j, k, l) or the nudge commands (arrow keys).
To join the cut back into the edit, press Tab.
Slip a Clip
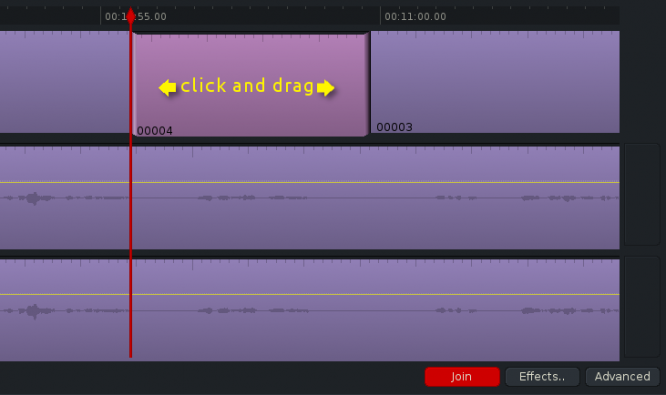
Another way to make edits without affecting the in and out points of the clip is to slip a clip's footage within its edit boundaries. The cuts themselves remain stationary in the Edit but the footage “inside” the clip starts earlier or later.
To slip a clip, navigate to the clip you want to affect. On the keyboard, you can move from splice to splice by pressing a to move the playhead left and s to move the playhead right.
Now you are parked at the incoming frame of the clip located just to the right of your playhead. To adjust the footage inside the clip without altering the cuts, press y. This unjoins the entire clip from the edit.
Slip the footage either left or right using either the play (j, k, l) commands or the nudge (arrow keys) commands. The global in-point remains the same, but the footage shifts. If you're trying this out for the first time, try watching the audio waveforms in the audio tracks; you can see what's happening there pretty clearly.
To join the cut back into the edit, press Tab.
To get more familiar with moving clips in your edit, continue on to the next section.

