This is a basic intro on how to get video into Blender, cut it up, throw in a transition, and watch what you've done. That's all this covers but there will be another later, noteably on getting your video out of Blender into some web-friendly or DVD-burnable format...
What is Blender? Blender is THE multimedia studio of the Free Software world that everyone always says doesn't exist yet. People like to compare Free Software to something proprietary as a point of reference, but in fact video production tools are difficult to draw straight comparisons; Blender isn't Final Cut Pro, it isn't After Effects, it's not Maya, it's not Shake, and it's not Smoke. But neither are any of the converse true. They are each their own models of doing related tasks, so rather than trying to draw a perfect comparison, we shall simply say that Blender is a powerful media manipulation environment for Linux, Unix, OS X and Windows.
Different areas of Blender are always being developed, and since its primary purpose is aimed toward animation, its Video Editing model is not as developed as I would like it to be (yes, I'm learning how to program and will contribute as soon as I can!) but it is such a powerful program with such a brilliantly designed UI that it's hard not to turn to it for video editing needs on Linux.
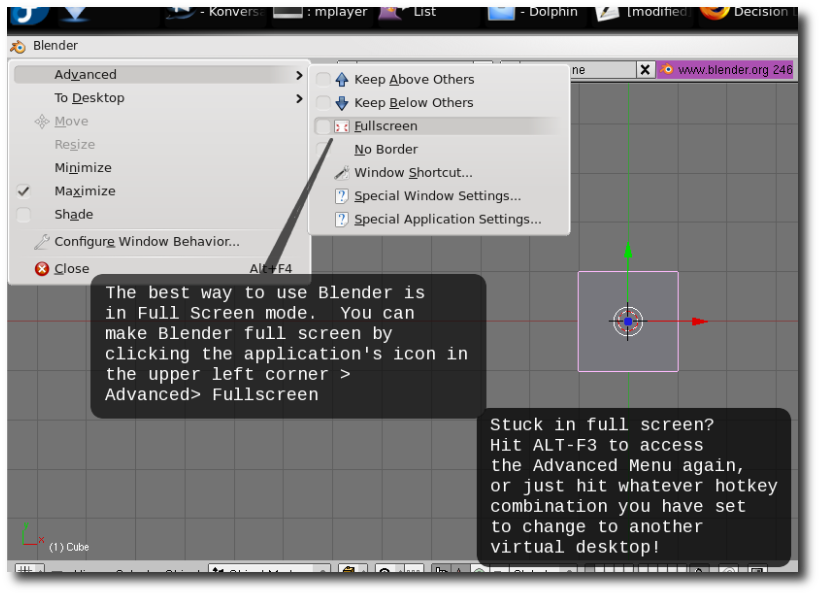
First Tip: Be wary of your distro's version of Blender. Most versions I've seen in repositories are not the most up-to-date and sometimes do not have all the codec support compiled in. You will do yourself a favour by downloading it straight from blender.org. I am as into Free Software codecs as the next guy, but when you're video editing for REAL you're getting video from all kinds of different places, so the more codec support the better.
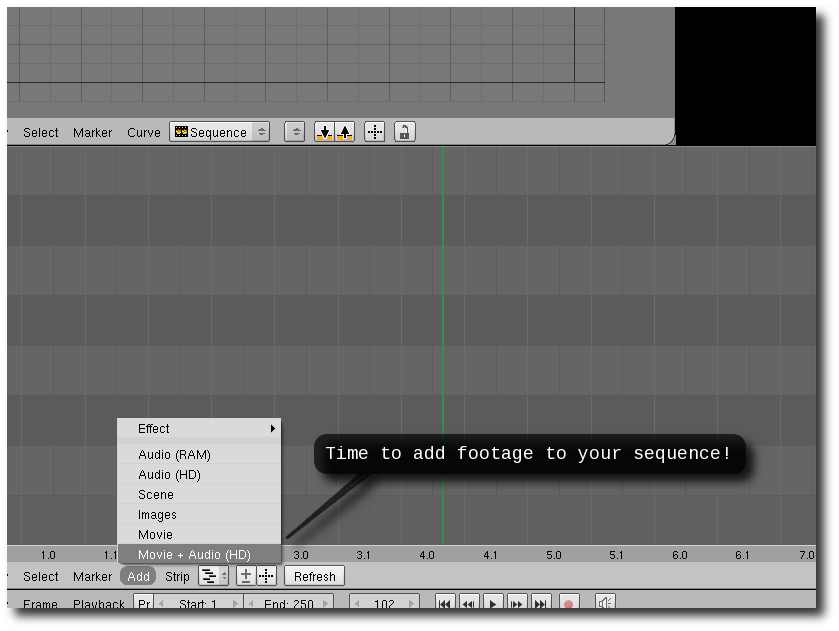
Enough preamble, let's edit:
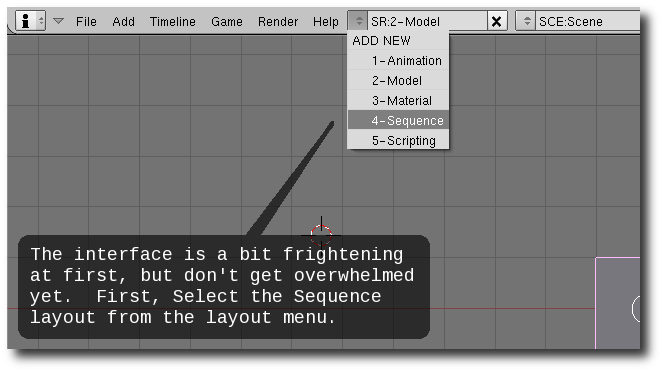

This is still a pretty intimidating interface but if you click just under the lower menu bars, you can collapse most of the windows that we won't be using.
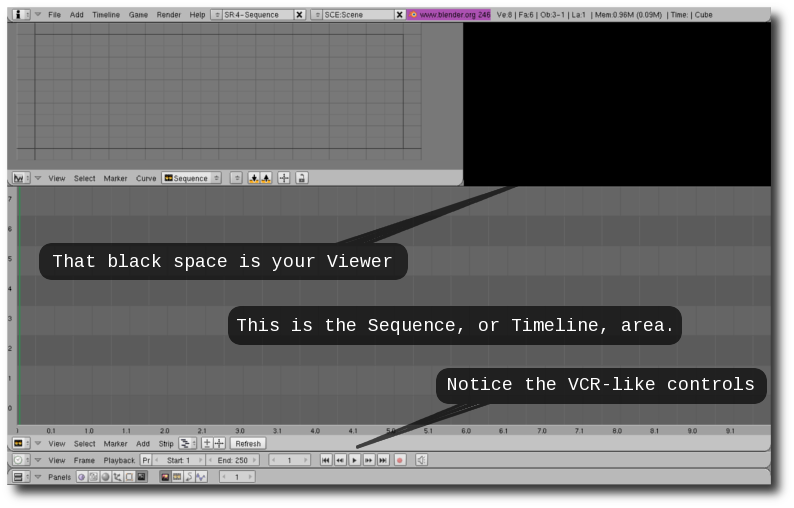
Chances are your video footage will be longer than the width of your screen. To move around within your sequence, press the MiddleMouseButton and drag. Use the ScrollWheel Up to enlarge your view of the sequence, or ScrollWheel Down to zoom out and see more of the sequence on your screen.
That's it for now. More as I get the screenshots made!
Update: more screenshots made...here's how to export.